When it comes to crafting polished, professional-sounding tracks, compression is the hero in every producer’s toolkit.
This “secret weapon” has the power to transform a mix from ordinary to extraordinary balancing dynamics, adding clarity, and giving your music the punch you're looking for.
Whether you’re smoothing out a vocal performance or making your drums hit harder, compression is a technique that defines the difference between amateur and professional productions.
In this article, we’ll dive deep into the world of compression!
What Is Compression?
At its core, compression is a tool used to control the volume of a track. The "dynamic range," refers to the difference between the quietest and loudest parts of a sound.
Without compression, this range can sometimes be too wide, causing some elements to get lost in the mix while others overpower everything else.
Compression helps bring balance, making your mix more cohesive, polished, and professional .
Think of it as an invisible hand on the fader that controls peaks and lifts quieter moments, ensuring that every note and beat is heard clearly.
Why Compression Is Important
Compression isn’t just about controlling volume—it’s about shaping the emotion and impact of your music. Tight compression on drums adds punch and energy, making your rhythm section hit harder. A well-compressed vocal track feels steady and intimate, drawing the listener in.
Mastering compression is like learning a new instrument—it takes practice and patience. Let’s explore the key settings that you need to know.
Key Compressor Settings
These controls let you fine-tune the dynamics of your track, whether you want a subtle touch or a dramatic effect. Let’s break them down:
1. Threshold
The threshold is the gatekeeper of your compressor. It determines at what volume the compression kicks in. For example, if you set the threshold at -10 dB, any audio signal louder than -10 dB will be compressed, while anything quieter remains untouched. Think of it as the line your audio must cross before the compressor takes action.
Pro Tip: Start by setting the threshold so that only the loudest peaks of your audio are affected, then adjust to taste.
2. Ratio
The ratio dictates how much compression is applied once the signal passes the threshold. if you’ve set a ratio of 2:1 and the signal is 2 dB over the threshold, output will be only 1 dB over the threshold. Higher ratios like 8:1 or 10:1 result in more aggressive compression, often used for limiting purposes.
Pro Tip: Use lower ratios (e.g., 2:1 to 3:1) for subtle control and higher ratios for taming unruly peaks or creating dramatic effects.
3. Attack
Attack controls how quickly the compressor reacts once the signal hits the threshold. A fast attack hits almost instantly, which is great for controlling sharp transients like drum hits. A slower attack allows those transients to pass through, preserving the natural punch of the sound.
Pro Tip: For vocals, try a medium attack to keep their natural flow. For drums, experiment with a faster attack to tame aggressive hits.
4. Release
Release determines how long it takes for the compressor to stop reducing the signal once it falls below the threshold. A quick release can make the effect more noticeable, while a slow release creates a smoother, more natural sound.
Pro Tip: Match the release time to the rhythm of your track to maintain a musical feel. Use a BPM calculator to find timings that match your tempo
5. Knee
The knee controls how slow or fast compression is applied to the audio signal. A hard knee applies compression immediately, creating a more aggressive effect. A soft knee, on the other hand, applies compression more gradually, resulting in a smoother transition.
Pro Tip: Use a soft knee for vocals and acoustic instruments to keep the effect subtle and natural.
6. Make-Up Gain
Compression often reduces the overall volume of a track. The make-up gain allows you to bring the level back up to it's original, ensuring your compressed signal sits perfectly in the mix without losing impact.
Pro Tip: Always compare the compressed signal to the original to make sure you’re enhancing, not dulling, the sound.
7. Output/Level Meter
A good compressor includes a level meter to help you monitor the input, output, and gain reduction. Keeping an eye on these meters ensures that your track remains balanced and dynamic.
Understanding these settings gives you the foundation to use compression effectively.
But knowing the tools is only half the battle—next, we’ll explore different types of compressors and when to use them to bring your music to life.
Different Types of Compressors and Their Applications
Not all compressors are created equal. Each type has its own personality, much like different brushes for a painter. Understanding their unique characteristics allows you to choose the right tool for the job.
1. VCA Compressors: The Swiss Army Knife
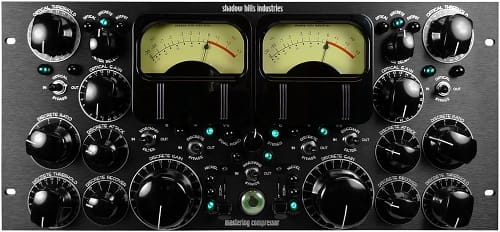
VCA (Voltage-Controlled Amplifier) compressors are the versatile all-rounders of the compression world. They’re precise, reliable, and known for their clean sound. They’re perfect for controlling dynamics without adding too much color.
Best For:
• Drums: Add punch and tighten the groove.
• Mix Bus: Glue the mix together with subtle yet impactful compression.
Examples:
SSL G-Series, dbx 160.
2. FET Compressors: The Speed Demon

FET (Field Effect Transistor) compressors are fast and aggressive, making them ideal for controlling transients and adding energy to a track. Their character adds a touch of grit and excitement, perfect for modern, punchy productions.
Best For:
• Vocals: Keep them steady and in your face.
• Drums: Tame wild peaks without losing impact.
Examples:
1176, Distressor.
3. Optical Compressors: The Smooth Operator
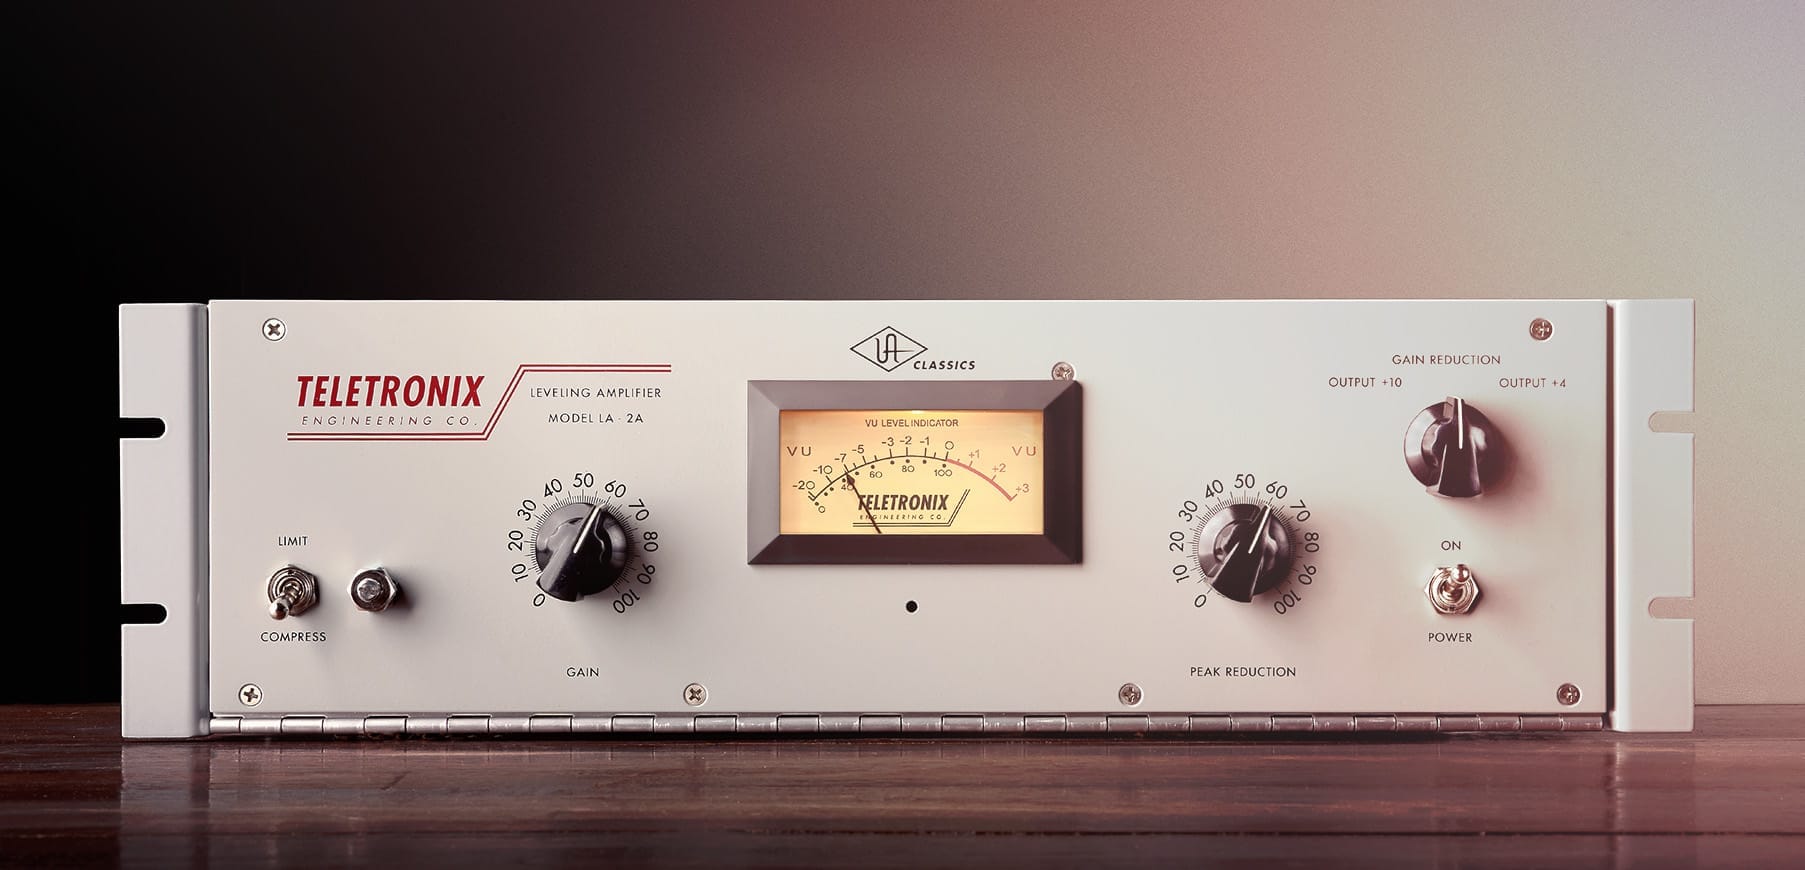
Optical compressors use a light element to control gain reduction, resulting in a smooth, musical sound. They’re less aggressive than FET compressors, making them a favorite for delicate and expressive performances.
Best For:
• Vocals: Add warmth and consistency.
• Bass: Maintain a steady low-end presence.
Examples:
LA-2A, Tube-Tech CL1B.
4. Tube Compressors: The Vintage Charmer
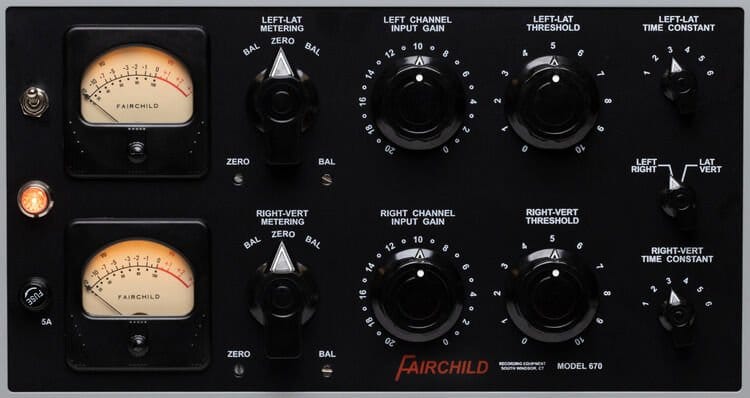
Tube compressors are all about character. They provide warm, rich coloration and a slow, natural response that enhances the overall vibe of a track. These compressors are less about precision and more about adding that extra “magic.”
Best For:
• Master Bus: Add warmth and glue to the final mix.
• Vocals: Infuse richness and vintage charm.
Examples:
Fairchild 670, Manley Vari-Mu.
5. Digital Compressors: The Modern Sculptor
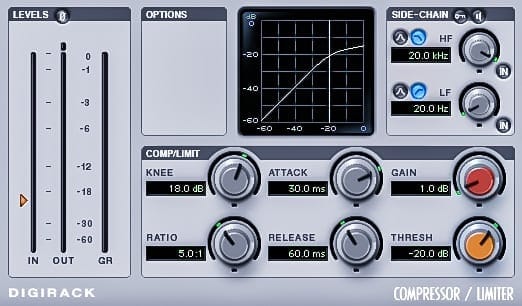
Digital compressors are the most flexible and innovative of the bunch. They combine elements from all other types while offering unique features like multiband compression, sidechain processing, and visual feedback.
Best For:
• Anything! Their adaptability makes them suitable for any part of the mix.
• Mastering: Use multiband compression to fine-tune specific frequency ranges.
Examples:
FabFilter Pro-C2, iZotope Neutron.
Choose the Right Compressor
The key to mastering compression lies in understanding which type of compressor fits your goal. For a punchy kick drum, try a FET compressor. For a warm vocal, an optical or tube compressor might be your best bet. For mastering go with a multiband compressor.
But most importantly, don’t be afraid to experiment and let your creativity guide you! There's no rules to this shit.
Next, we’ll dive into practical compression tips and techniques.
Practical Tips for Using Compression Effectively
Compression is as much an art as it is a science. While understanding the settings and types of compressors is essential, knowing how to use them in real-world scenarios is where the magic happens. Below are practical tips to help you apply compression effectively and elevate your tracks.
1. Avoid Over-Compression
Just because compression is powerful doesn’t mean more is always better. Over-compressing can squash your track’s dynamics, making it sound lifeless and flat. Sometimes compression isn't even needed. Don't put a compressor on a track just because you think it's "professional" or out of habit. Listen to the track and use it, if necessary.
Tip: Use your ears—listen for natural dynamics and adjust the ratio and threshold sparingly. A good mix breathes; compression should enhance that, not smother it.
2. Start with Subtle Settings
If you’re new to compression, subtlety is your best friend. Start with a low ratio (e.g., 2:1), a medium attack, and a medium release. Gradually adjust the threshold until you hear the effect kicking in.
Tip: Focus on subtle gain reduction—around 1–2 dB is often enough to control dynamics without making the compression obvious.
3. Listen in Context
Compression can sound very different in solo versus in the full mix. What might seem perfect on an isolated vocal could overpower or disappear when other instruments are present.
Tip: Always apply compression while listening to the entire mix. This ensures every element works together cohesively.
4. Use Sidechain Compression for Clarity
Sidechain compression is a game-changer, especially for genres like EDM and pop. It allows one track (like a kick drum) to trigger the compression of another track (like a bassline), creating space and avoiding frequency clashes.
Tip: Set a fast attack and release on the compressor triggered by your kick drum to achieve that signature “pumping” effect.
5. Explore Parallel Compression
Parallel compression, also known as New York compression, is a technique where you blend a heavily compressed version of a track with its original signal. This allows you to add energy and punch without sacrificing dynamics.
Tip: Duplicate your track, apply heavy compression to the duplicate, and mix it back in at a lower level to taste.
6. Match Levels with Make-Up Gain
After applying compression, the overall volume of your track may drop. Use the make-up gain to bring the level back to where it was before compression, ensuring your track doesn’t lose its presence in the mix.
Tip: Compare the compressed and uncompressed signals at the same volume to hear the true impact of your adjustments.
7. Match Your Settings to the Material
Not all instruments or vocals require the same compression settings. A drum track may need fast attack and release times to control transients, while a vocal may benefit from slower settings to preserve its natural flow.
Tip: Experiment with different attack and release times to find the sweet spot for each element in your mix.
8. Trust Your Ears Over Meters
While gain reduction meters and visual tools are helpful, they can’t replace your ears. Compression is about feeling the dynamics, not just seeing numbers.
Tip: Close your eyes and listen. Does the compression make the track feel more controlled and impactful, or does it sound unnatural? Adjust accordingly.
Final Thoughts on Practical Compression
Compression is a tool of balance and creativity. With these tips, you can shape your tracks to sound polished and professional. Up next, we’ll explore specific use cases for compression across vocals, drums, bass, and more.
How To Use Compression
Compression isn’t a one-size-fits-all solution—it’s a versatile tool that adapts to the unique needs of each element in your mix. From adding energy to drums to taming unruly vocals, knowing how to apply compression in specific scenarios can take your tracks to the next level. Let’s explore some common use cases and best practices.
1. Vocals: Smooth and Consistent
Vocals are often the centerpiece of a mix, and compression ensures they remain clear, steady, and emotionally impactful. It can tame peaks, bring out softer phrases, and make the vocal sit perfectly in the mix.
How to Apply:
• Start with a medium attack to let natural transients shine.
• Use a ratio of 3:1 or 4:1 to even out dynamics.
• Adjust the release to complement the vocal’s rhythm and phrasing.
Pro Tip: For even more control, use a second, lighter compressor in the chain or try parallel compression for added thickness.
2. Drums: Punch and Impact
Drums are all about energy, and compression can emphasize their power and consistency. Whether it’s the kick, snare, or overheads, each drum element can benefit from tailored compression.
How to Apply:
• For kicks and snares: Use fast attack and release settings to control transients while retaining punch.
• For overheads: Opt for a slower attack and release to glue the drum kit together.
• On the drum bus: Apply gentle compression (2:1 ratio) to unify the drums.
Pro Tip: Use parallel compression to add extra punch to the drums without sacrificing dynamics.
3. Bass: Tight and Steady
Basslines form the foundation of your mix, and compression ensures they stay consistent, especially in tracks with fluctuating dynamics. It’s also great for locking bass and kick drums together for a tight low end.
How to Apply:
• Use a ratio of 4:1 with a medium attack and release.
• Adjust the threshold to catch peaks without over-squashing.
• Sidechain compress the bass to the kick drum for added clarity.
Pro Tip: Layer compression with EQ to sculpt the perfect low-end balance.
4. Guitars: Control and Balance
Guitars, whether clean or distorted, often have sharp peaks that need taming. Compression can smooth out the performance while maintaining its character and energy.
How to Apply:
• Clean guitars: Use soft knee compression with a slow attack for a natural sound.
• Distorted guitars: Apply faster attack and release to tighten up the performance.
Pro Tip: On rhythm guitars, use subtle compression to keep strumming dynamics consistent.
5. Mix Bus: Glue It All Together
On the mix bus, compression serves as the glue that binds all the elements together, creating a cohesive and polished sound. It adds subtle dynamics control without compromising the mix’s energy.
How to Apply:
• Use a low ratio (e.g., 1.5:1 to 2:1).
• Set a slow attack to let transients shine through.
• Apply gentle gain reduction (1–2 dB) for transparency.
Pro Tip: Avoid heavy compression on the mix bus—it should enhance the mix, not dominate it.
6. Mastering: Final Touches
In mastering, compression provides the final polish, ensuring the track translates well across all playback systems. It’s all about subtlety and precision.
How to Apply:
• Use multiband compression to target specific frequency ranges.
• Apply a gentle ratio (e.g., 1.5:1) for overall glue and balance.
Pro Tip: Less is more in mastering. Focus on transparency and avoid over-compressing.
Final Thoughts on Compression Use Cases
Each element in your mix has its own story to tell, and compression is your tool to help it shine. By understanding how to adapt compression to vocals, drums, bass, and beyond, you can craft mixes that sound balanced, impactful, and professional.
In the next section, we’ll discuss common mistakes to avoid and how to troubleshoot compression issues, helping you refine your skills even further!
How to Use Compression for a Better Mix
Compression isn’t a one-size-fits-all solution—it’s a versatile tool that adapts to the unique needs of each element in your mix. Knowing how to apply compression in specific scenarios can take your tracks to the next level. Let’s explore some common use cases and best practices.
1. Vocals: Smooth and Consistent
Vocals are often the centerpiece of a mix, and compression ensures they remain clear, steady, and emotionally impactful. It can tame peaks, bring out softer phrases, and make the vocal sit perfectly in the mix.
How to Apply:
• Start with a medium attack to let natural transients shine.
• Use a ratio of 2:1 or 3:1 to even out dynamics.
• Adjust the release to complement the vocal’s rhythm and phrasing.
Pro Tip: For even more control, use a second, lighter compressor in the chain or try parallel compression for added thickness.
2. Drums: Punch and Impact
Drums are all about energy, and compression can emphasize their power and consistency. Whether it’s the kick, snare, or overheads, each drum element can benefit from tailored compression.
How to Apply:
• For kicks and snares: Use fast attack and release settings to control transients while retaining punch.
• For hit hats and cymbals: Opt for a slower attack and release to glue the drum kit together.
• On the drum bus: Apply gentle compression (2:1 ratio) to unify the drums.
Pro Tip: Use parallel compression to add extra punch to the drums without sacrificing dynamics.
3. Bass: Tight and Steady
Basslines form the foundation of your mix, and compression ensures they stay consistent, especially in tracks with fluctuating dynamics. It’s also great for locking bass and kick drums together for a tight low end.
How to Apply:
• Use a ratio of 3:1 or 4:1 with a medium attack and release.
• Adjust the threshold to catch peaks without over-squashing.
• Sidechain compress the bass to the kick drum for added clarity.
Pro Tip: Layer compression with EQ to sculpt the perfect low-end balance.
4. Guitars: Control and Balance
Guitars, whether clean or distorted, often have sharp peaks that need taming. Compression can smooth out the performance while maintaining its character and energy.
How to Apply:
• Clean guitars: Use soft knee compression with a slow attack for a natural sound.
• Distorted guitars: Apply faster attack and release to tighten up the performance.
Pro Tip: On rhythm guitars, use subtle compression to keep strumming dynamics consistent.
5. Mix Bus: Glue It All Together
On the mix bus, compression serves as the glue that binds all the elements together, creating a cohesive and polished sound. It adds subtle dynamics control without compromising the mix’s energy.
How to Apply:
• Use a low ratio (e.g., 1.5:1 to 2:1).
• Set a slow attack to let transients shine through.
• Apply gentle gain reduction (1–2 dB) for transparency.
Pro Tip: Avoid heavy compression on the mix bus—it should enhance the mix, not dominate it.
6. Mastering: Final Touches
In mastering, compression provides the final polish, ensuring the track translates well across all playback systems. It’s all about subtlety and precision.
How to Apply:
• Use multiband compression to target specific frequency ranges.
• Apply a gentle ratio (e.g., 1.5:1) for overall glue and balance.
Pro Tip: Less is more in mastering. Focus on transparency and avoid over-compressing.
Final Thoughts on Compression in Music Production
Each element in your mix has its own story to tell, and compression is your tool to help it shine. By understanding how to adapt compression to vocals, drums, bass, and beyond, you can craft mixes that sound balanced, impactful, and professional.
Compression is one of the most powerful tools in a producer’s arsenal, capable of transforming a good mix into a great one. From balancing dynamics to adding punch, warmth, and cohesion, it’s the secret ingredient behind professional-sounding tracks.
As with any skill, the key to mastering compression lies in practice and experimentation. Start small, explore different compressor types, and let your ears guide you.
Remember, compression is not just a technical process—it’s a creative tool that allows your music to express its fullest potential!
Follow the future of music with Empress. Check out our blog to learn how you can effectively use these AI music tools.
